Deciding on a perfect facial expression for a toy can be a really time consuming task. I will not even attempt to cover all main possibilities. What I would like is to give an example how it can be done and hope that it will be helpful enough for you to make any kind of nose and mouth that you can imagine for your toy! Please note that are endless possibilities to this kind of embroidering, so this is for sure not the only proper way to make your toy smile 😉
Below you can follow a detailed photo-tutorial on how to embroider both nose and mouth, which were used in the Drop-Ear Dog project.
First, take a look at the steps in the schemes and then scroll down for the photos.
You can download a full tutorial in the PDF version:
MyScrappyIdeas _Tutorial_NOSE_AND_MOUTH
Example scheme of nose and mouth embroidery (click on any image to enlarge):
I. Embroidering a nose:


II. Embroidering nose borders:


III. Embroidering a mouth (I used different color of markings only for tutorial purposes, normally you continue embroidering with the same thread as you used for the nose):


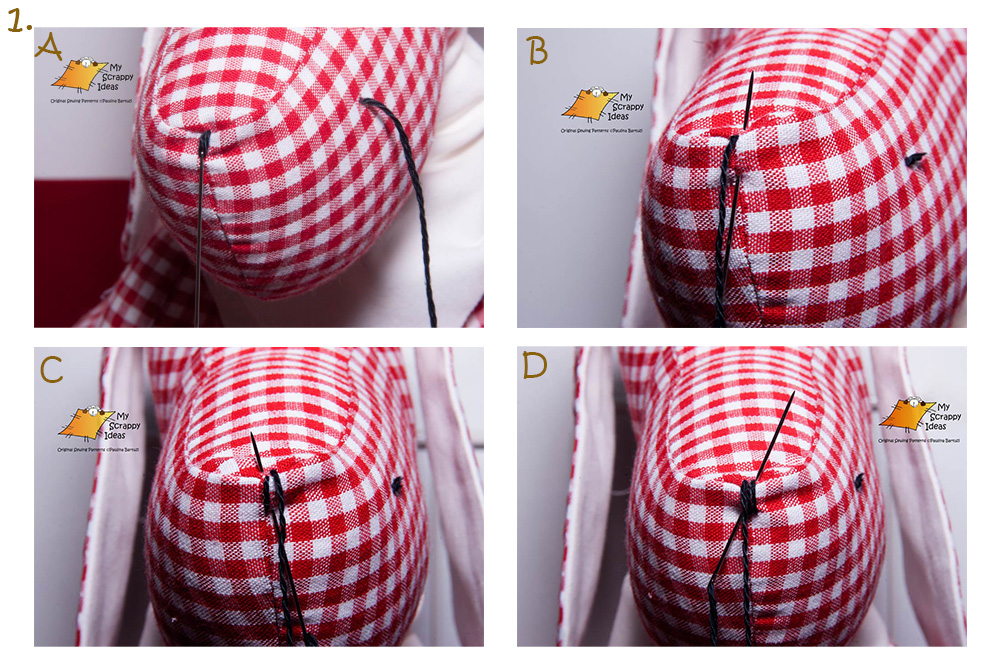
Step 1.
A. Make a knot and insert the needle in the side of the snout, bringing it exactly in the middle of future nose
(a little longer needle with quite big eye will make your life definitely easier).
B. Bring the needle through the snout’s center seam to the top of the snout. Bring it as far from the initial needle pinch (marked as “2” in the example scheme I above), as thick you wish the nose to be. In the pictures below I kept this distance rather short.
C./ D. Follow the scheme in the beginning of this tutorial on how to further embroider the nose.
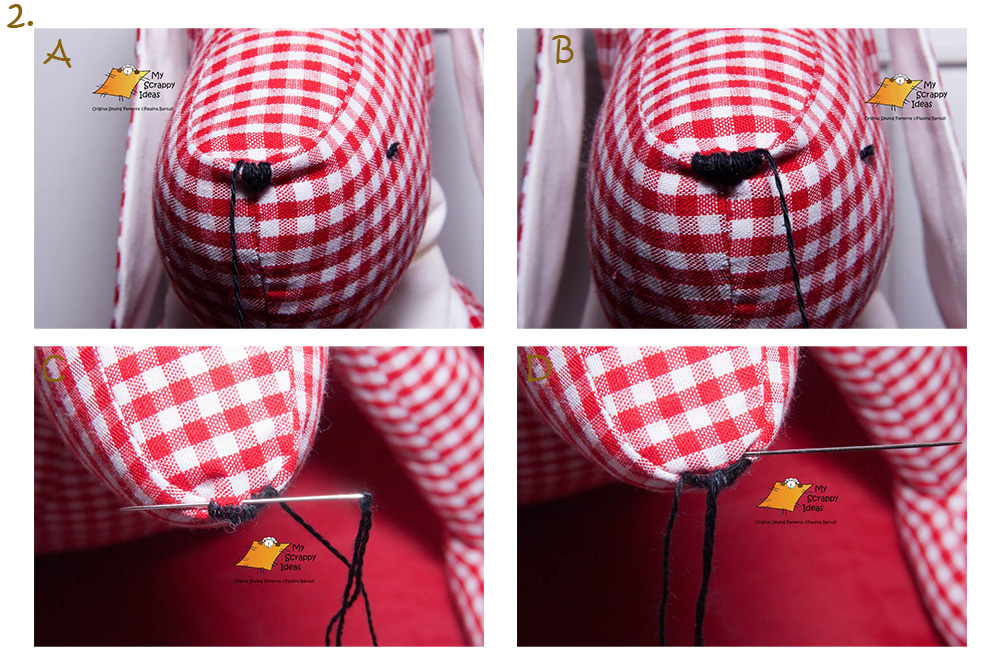
Step 2.
A./ B. Make a nose as wide as you wish. Guiding your needle from one side of the snout to the other will make it more firm and result in a much nicer look of the nose. While embroidering, I pulled the thread a bit tighter to make the nose pucker on purpose (but this is up to you how tight you will pull the thread).
C. Embroider the top marking line of the nose. When you finish embroidering the nose to the desired width, make your needle exit in the top right corner of the nose and insert it back in the nose top center point. Needle should be immediately guided to exit at the opposite top left corner of the nose.
D. Insert the needle back in the top center point, exit in the initial top right corner and insert it again in the top center. This way you have the upper border of the nose completed.
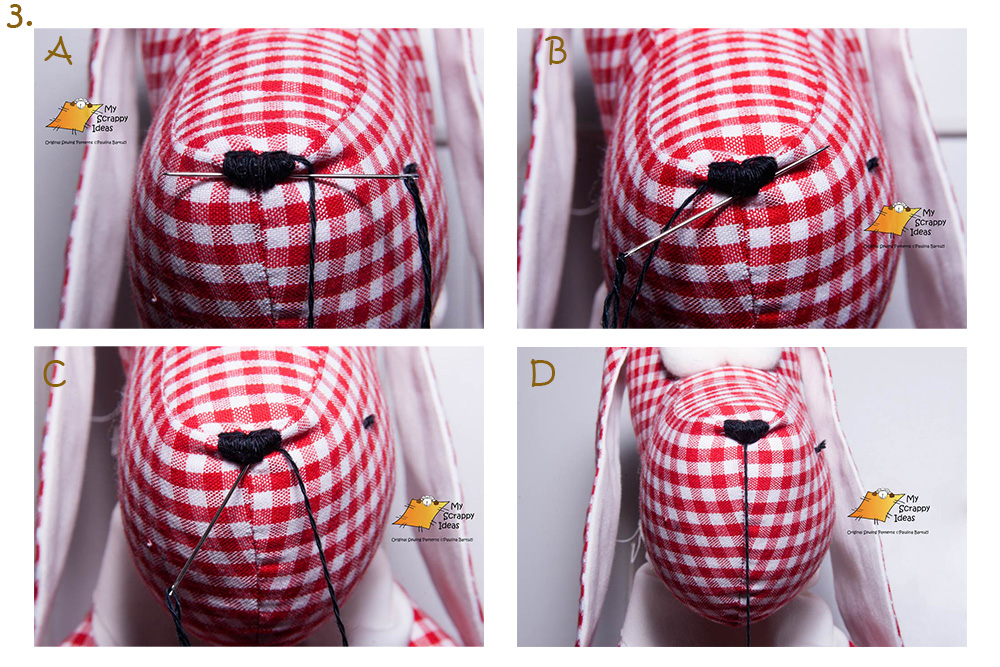
Step 3.
A. / B. / C. Do the same “border-marking” stitching for the bottom of the nose.
D. Eventually, have the thread come out from the snout’s center seam, at the bottom of the nose.
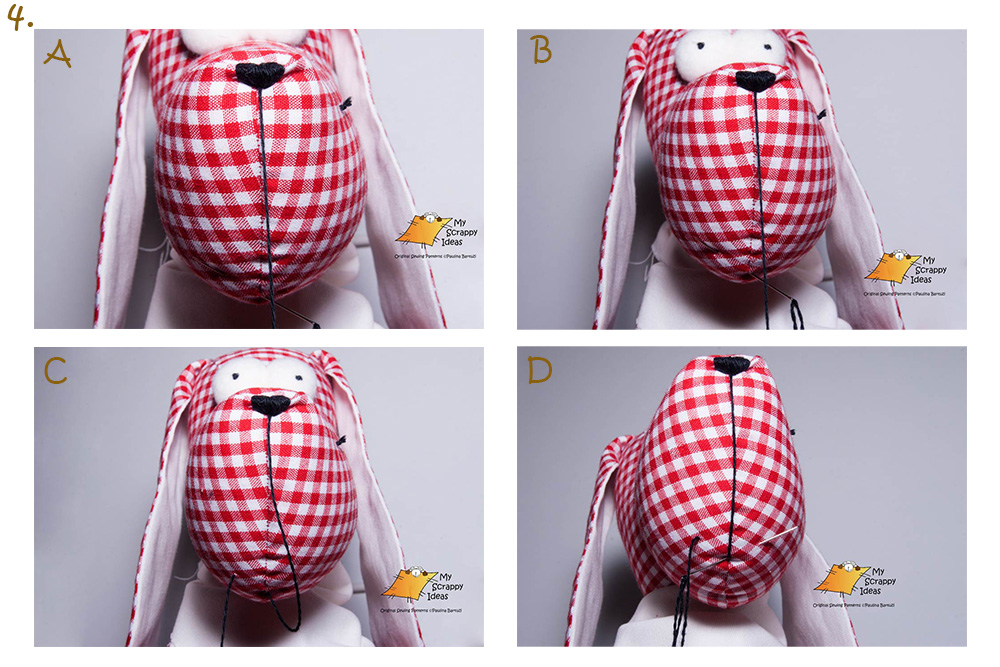
Step 4.
A. / B. / C. Bring the needle through the snout’s center seam to the side, starting to make a smile.
D. Insert the needle back into the center seam and exit at the other side of the snout, making a symmetrical smile.
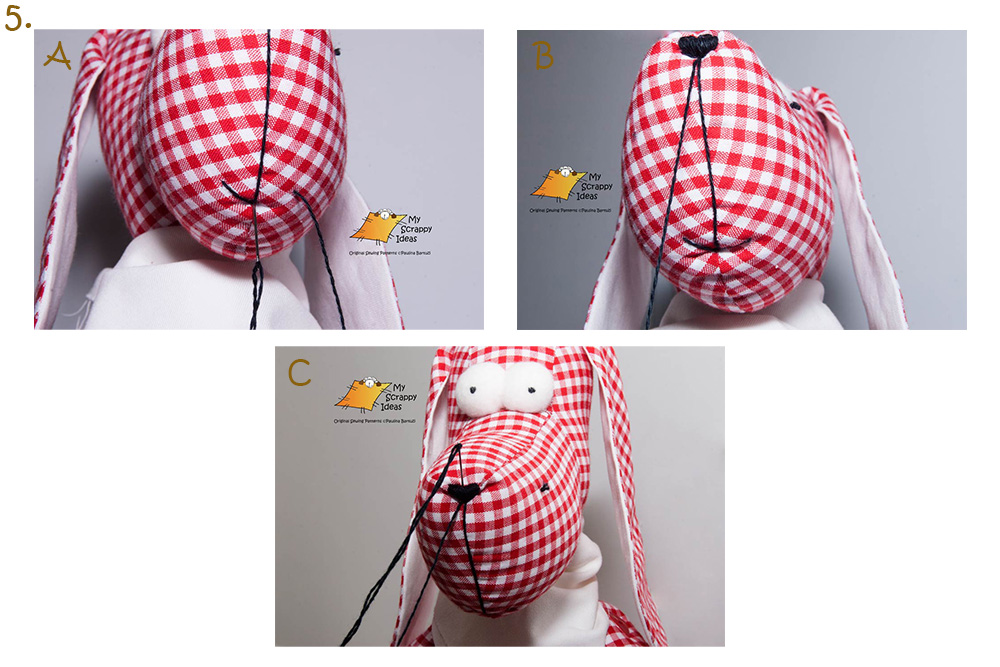
Step 5.
A. Bring the needle to the starting point of the smile in the snout’s center seam…
B. …and guide it through the snout to exit at the base of the nose, where you started sewing your toy’s mouth. By pulling the thread in these steps you will give your toy a kind of a “chin”.
C. I usually make now another loop or two around the nose to secure the thread and exit bringing the needle somewhere around the initial knot on snout’s side.
Step 6. Snip the thread (together with the starting knot) sinking the thread ends in the snout and you’re done!